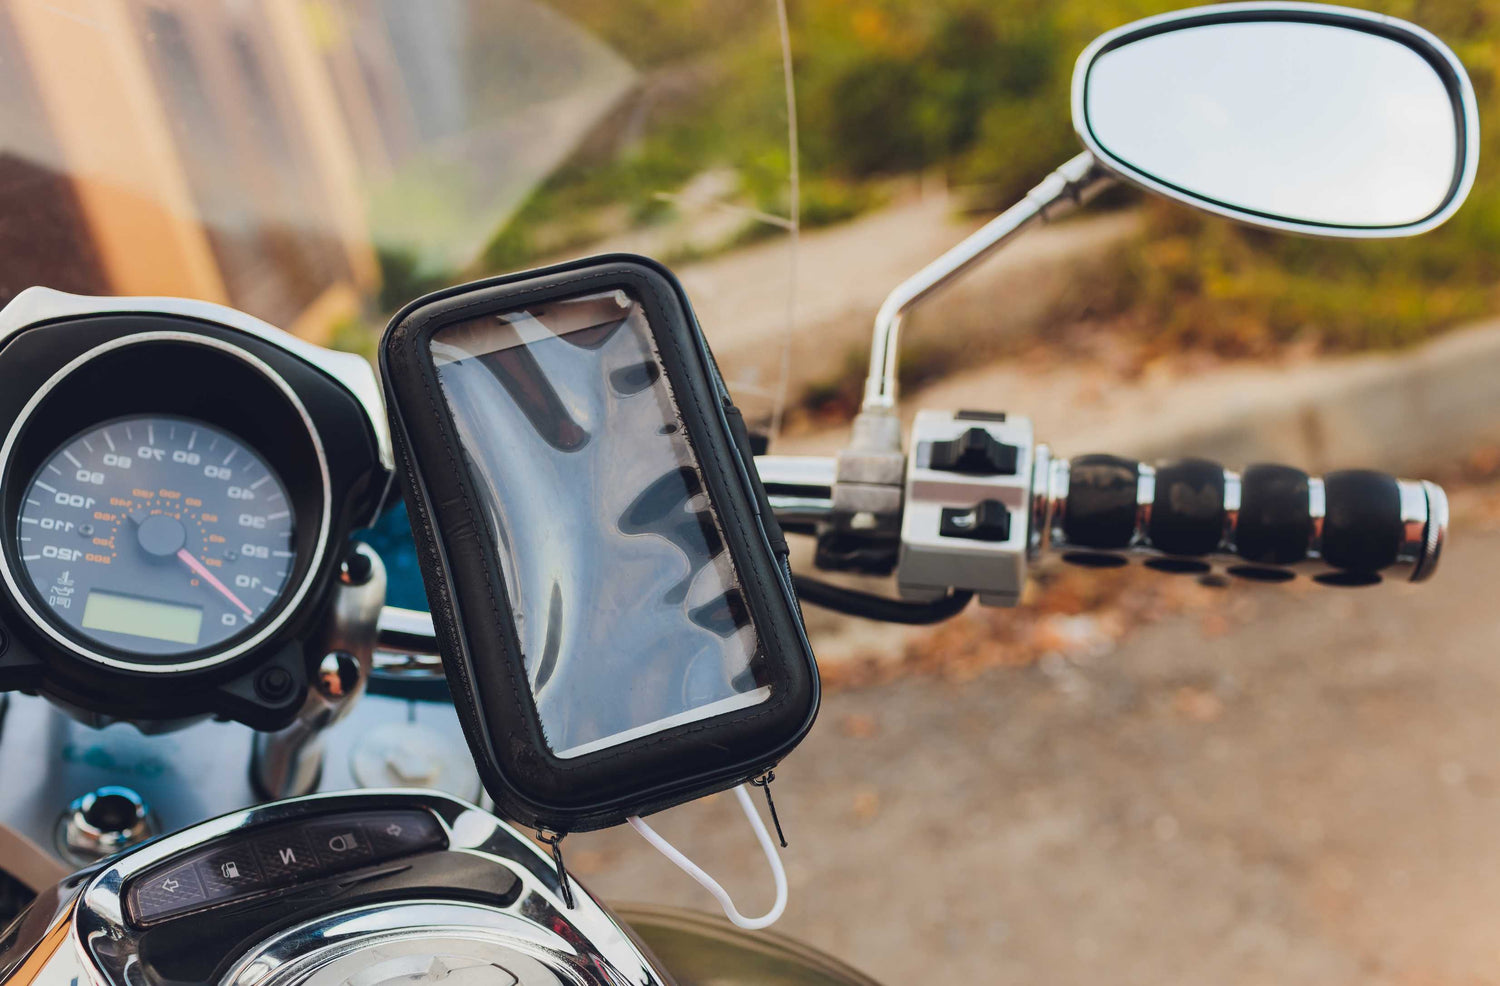
Motorcycle handlebar mounts can seem like a little thing in the grand scheme of your ride, but they play an important role in your convenience and safety. Whatever you are using your mount to store, be it a phone, a GPS, a GoPro, or something else, how you install and maintain it can be the difference that lands you in hot water on the road.
Picture yourself riding down a scenic backroad when your phone comes loose and soars off your bike. Or, better still, picture your mount getting in the way of your throttle or brake controls? These are more frequent occurrences than you might imagine—and more often than not, the product of small but preventable errors.
In this manual, we'll break down seven of the most common motorcycle handlebar mount mistakes, explain how they affect your ride, and—most importantly—show you how to avoid them. We'll also show you how to select the proper mount for your motorcycle and why motorcyclers rely on GRxplore's motorcycle handlebar mounts when reliability matters most.
Let's begin at the start: why do handlebar mounts even exist in the first place?

What Is a Motorcycle Handlebar Mount (And Why It's More Important Than You Think)
If you've ever had directions on your phone, taped a ride on an action cam, or tracked your path on a GPS, then you already know the value of a good motorcycle handlebar mount. It places your device in front of you and in your hand, providing instant access without taking your eyes off the road for even a second.
But the issue is this: a badly constructed or improperly installed mount can become a liability in a moment. It can shake loose, get in the way of seeing, or even hurt your device or bicycle.
Then there are the mistakes. Ask yourself this first: Is the handlebar mount on your current bike actually doing its job? If you're not sure, then read on. You may be making one of the following mistakes without even knowing it.
Mistake #1: Over-Tightening the Motorcycle Handlebar Mount
When tightening a motorcycle handlebar mount, riders tend to think "tighter is better." It just feels the most normal way to keep things from loosening, especially when you're about to go on a long or bumpy ride. However, over-tightening has a very negative effect.
Doing it in excess will break plastic components, ruin handlebar surface finish, or strip threads on handlebar mounting bolts. Overtightening on aluminum or carbon handlebar materials can actually compromise the bar's structural integrity.
So, how do you prevent it? If you have a torque wrench, use it; otherwise, use the manufacturer's instructions. The mount needs to be tight, not stretched out. A tight mount will roll rough trails without crushing your gear or your handlebars.
And speaking of placement, there is another mistake that will make your ride tougher than it has to be…
Mistake #2: Placing the Mount in the Wrong Spot
It may look like just about any place on your handlebar will work, but there is such a thing as good placement. Bad placement will get in the way of your view of your speedometer or warning lights. Worse, it can get in the way of your controls—your throttle, clutch, or front brake, for instance.
Others also position their mount too close to the set of controls or at an angle so that their forearm or wrist keeps bumping against it. Others position it at an angle so that it creates glare or is hard to see during sunlight.
To get it right, get a job that's:
● Simple to notice without taking your eyes off the road for too long
● Far enough from controls to avoid interference
● Without any cables or levers
Now that you've found the perfect spot, do you double-check that your horse actually fits?

Mistake #3: Using the Wrong Size or Type of Mount
Handlebars come in multiple diameters. 7/8" is standard stock bar, but adventure and cruise models can have 1", 1.25", or tapered bars. Mounting a bar of a different size than your bar can cause looseness or no fit at all.
There are some that are specifically for particular handlebar shapes or have shims for universal use. Some require ball-socket joints or rails to function.
Before you purchase or install a mount, ensure:
● Your handlebar diameter
● Whether the mount supports tapered bars
● The support structure (clamp, ball joint, adhesive, etc.
It's only halfway to victory to have the right size. You also need to consider how your horse is built, particularly during bumpy rides.
Mistake #4: Skipping Vibration Protection
Vibration is one of the biggest dangers to mounted gear, especially phones. Some of the latest phones have optical image stabilization (OIS) in their cameras. Prolonged vibration from your bike can ruin those internal components, leading to blurry photos or a dead camera.
Most cyclists avoid vibration-damping accessories because they don't want to spend time and money. But this is a cut you will come to regret.
Good motorbike handlebar mounts either come with integrated dampeners or offer them as an accessory. GRxplore handlebars, for example, come with shock absorption for touring and off-road.
So don't simply strap it on and fly away. Ensure that your mount is keeping your equipment as safe as possible, as well as keeping it secure.
Of course, not each mount is the same, which leads us to our second realization.
Mistake #5: Buying a Cheap or Poor-Quality Motorcycle Handlebar Mount
It's worth resisting the urge to use the cheapest mount you can find on the internet. Cheap materials and poor design are more expensive in the long term—literally.
Cheap mounts will employ thin plastic, poor ball joints, or flimsy rubber that all get mushy in a hurry. They might hold your phone perfectly at a standstill, but ride a few potholes or get on the highway at 70 mph, and they begin to fail.
Then what are you searching for?
● Reinforced structure (aluminum or high-impact resins)
● Secure locking devices
● Encouraging words from real bikers
● Quality brands with guarantees
GRxplore handlebar mounts are designed for riders who travel off-road beyond urban streets. Made of durable materials and tested on rough trails, they hold up ride after ride.
After your mount is safely fastened, don't forget one last crucial detail: the cables.

Mistake #6: Forgetting Cable Management
Even if your bike is perfect, messy charging cables can mar your ride. Loose cables trail behind, flap in the wind, catch on levers, or catch on your gloves while riding.
It's a small thing, but smart cable management helps:
● Avoid distraction
● Do not obstruct steering or controls.
● Make your settings look tidy and professional.
Tie the wires to the bars using short cable ties or clips. Make sure the cables are not restricting movement when turning the handlebars sharply left and right.
With your cable and mount installed, there's one last habit that gets you the biggest return: consistency.
Mistake #7: Not Checking the Mount Regularly
Motorcycle handlebar mounts are exposed to the sun, rain, vibration, and road dirt. Bolts get loose and parts wear out eventually—even on good mounts.
That's why it's wise to:
● Check your horse prior to every ride
● Secure bolts if necessary
● Inspect for cracks or wear
● Re-secure cables
It's only 30 seconds, and it may just save your phone, your camera, your life.
Now that you've learned what not to do, let's talk about how to choose the right motorcycle handlebar mount in the first place.
How to Choose the Best Motorcycle Handlebar Mount
Buying the appropriate mount starts with knowing your bike and what you require. Below are some key factors to consider:
Handlebar Fit
Make sure the mount is the correct size and shape to fit your handlebar. Universal mounts are great, but only if they stay put.
Construction Quality
Seek weather-resistant materials that are as durable as aluminum or glass-filled nylon. Steer clear of cheap plastics or screws.
Locking and Adjustability
Choose mounts that lock in place and provide 360° adjustments. You need your screen at its optimal angle for fast glances.
Vibration Control
If you're mounting a phone or camera, you need vibration dampeners. GRxplore's motorcycle handlebar mounts have this built into their design.
Now, let's talk about what makes GRxplore unique.
Why Riders Trust GRxplore Motorcycle Handlebar Mounts
Riders enjoy GRxplore because we design mounts with the same spirit we'd approach adventure with—tough, secure, and no-nonsense.
That's what you're getting with a GRxplore mount:
● Adventure-class ruggedness
● Standard and oversized bars fitment
● Integrated vibration dampening
● Roomy minimalist style that doesn't clutter your cockpit
● Tested and trusted by real riders on real terrain
We're not really selling mounts—we're making equipment that withstands wind, rain, mud, and the test of time.
Conclusion
A motorcycle handlebar mount is not where you stick your camera or your phone—it is a component of your ride. By avoiding these mistakes, you will be making your rides safer, smoother, and more enjoyable.
Double-check your setup as is. Make a few minor tweaks in some areas. And if you can level up, upgrade to gear designed for the ride ahead.
Got questions about the right motorcycle handlebar mount for you? Contact us—we're riders, too, and would be more than happy to help you find the right one.
FAQs For Motorcycle Handlebar Mounts
1. Are motorcycle handlebar mounts universal?
Not all mounts are universal. Be sure to check your handlebar diameter and device compatibility before you purchase.
2. Can handlebar mounts damage my phone?
Without vibration damping, mounts can ruin phone cameras, particularly on bumpy roads.
3. How do I avoid slipping off my mount?
Keep handlebars clean before mounting and do not over-tighten. Use mounts with a locking mechanism.
4. Where is the best place to install a mount?
Mount it where you can see it, but won't obstruct gauges or get in the way of controls.
5. How frequently must I inspect my mount?
Before every ride, inspect for loose bolts, cracks, or worn parts.


